Here's the process: I prepared the 35mm film strip by using an exposed Instax picture from my stock, holding the strip over the picture in the desired angle and cutting away the protruding edges of the film (ouch!). Once the film was trimmed, I put the 35mm strip, together with a pair of scissors, adhesive tape and my loaded Instax 100 into a changing bag. Now came the tricky part. I opened the camera, took out the pack and ripped away the the light seal. The light seal is the strip of thin flexible video tape-like plastic (some of you might remember video tapes) that covers the slot on top of the film pack. Removing the seal made it a lot easier to slide the film sheets in and out. Then I carefully pushed out the first sheet. Now the 35mm film was positioned over the light sensitive side of the Instax film and taped around the edges. I shoved the sheet back into the pack and reloaded the camera. Piece of cake, isn't it?
Ready for the first shot. The camera was pointed at a white background and fired. The picture with the taped-on film strip was ejected without jamming. Whew!
 | |
| Art or rubbish? Art. If you ask me. |
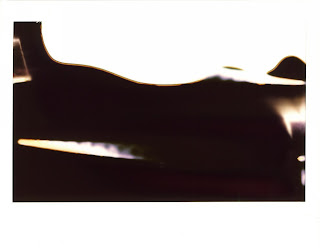
Oops! Totally messed up. What happened?
Seems like I accidently flipped the Instax film sheet in the changing bag and taped the 35mm film over the picture side of the sheet. In addition I didn't handle it careful enough, so the pod with the chemicals broke open and the picture developed in the cosy darkness of the changing bag. That's why the picture is unevenly developed and mostly black.
Ok, back to the changing bag.
This time I taped the negatives to the correct side and handled it more carefully.
 |
| Blue wisps of fog. |
Back to the bag. Once again.
This time I wanted to remove the negative strip before developing the picture. Fortunately the Fuji Instax doesn't eject the picture until you release the shutter button. So I exposed the shot, but held the shutter button pressed until the camera was back in the changing bag and the pack was unloaded. Now I had to slide the sheet out, remove the 35mm strip and slide it back into the pack. The camera was then reloaded and fired in the complete darkness of the bag. This is what came out:
 |
| Almost there. |
Much better. Now it is evenly developed.
By the way: The pictures above were intentionally overexposed. The shutter of the Instax 100 tops out at 1/200 s. All shots were exposed in bright sunlight (EV 15), So a film speed of ISO 200 and an aperture of f/16 (or an equivalent setting) would have been recommended. But the Instax system is fixed to ISO 800 and f/14. That's two stops overexposure due to the faster film plus one third of a stop for the larger aperture. But I think the Instax wide film handled the 2.33 stops overexposure quite well. Taken note of and noted.
For the last shot I added a Cokin polarizer filter that decreases light by 2 stops. And of course I removed the 35mm negative before ejecting the shot.
 |
| Contact! |
Ta-Dah!!! Evenly developed, well exposed negative strip and still a white background. Looks good to me.
 |
| Today's yield. The entire process was done in about 45 minutes. |
I hope this article inspired you to play with this technique (maybe adding a coloured background, using slides, b&w film, medium and 110 format or any transparent and semi-transparent stuff one can imagine...). I will certainly do.
Have fun and stay tuned.
PS: Just in case someone cares: the 35mm negatives were taken from the test roll I recently ran through my Leica mini.


